Syncing your artboards from Photoshop to Marvel can be quick and easy by using the generator for image assets in Photoshop. This workflow works both on MacOS and Windows.
Step 1: Turn on generate
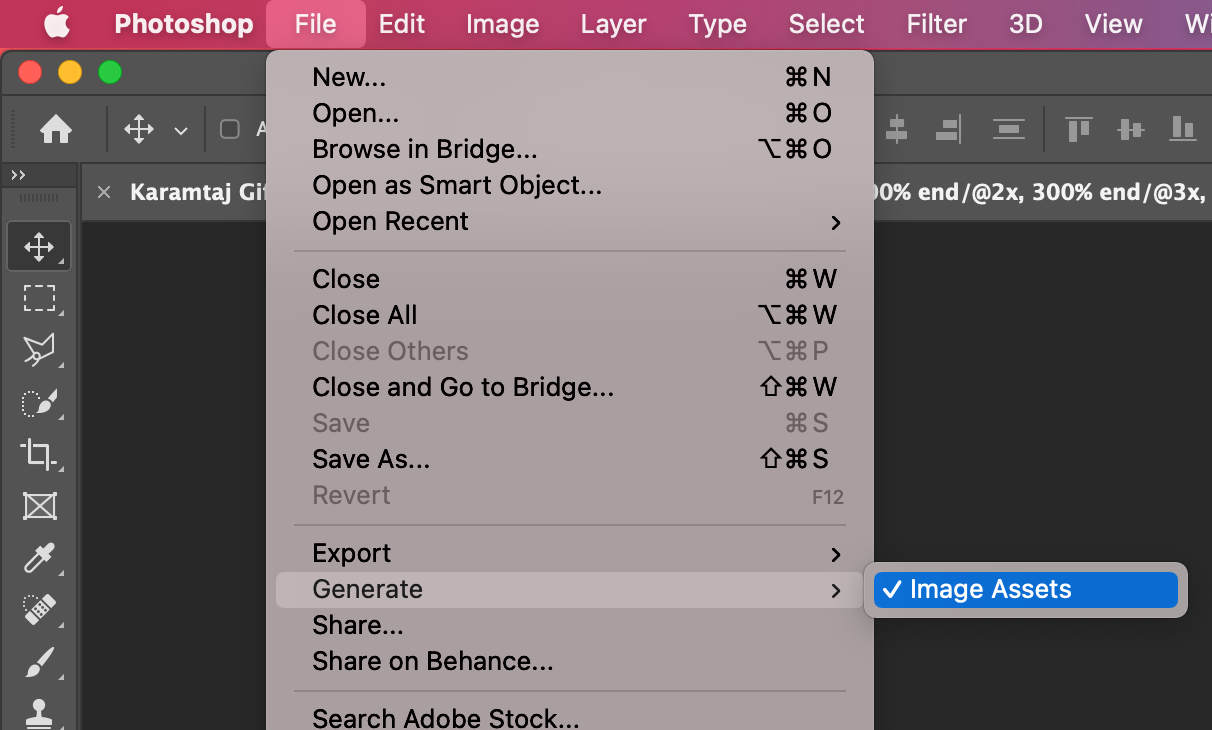
Go to “File” → “Generate” → “Image Assets.” and ensure this is checked.

Note that this is a file based settings so each time you create a new file you will have to turn this on again.
Step 2: Rename the layers you want to export to Marvel
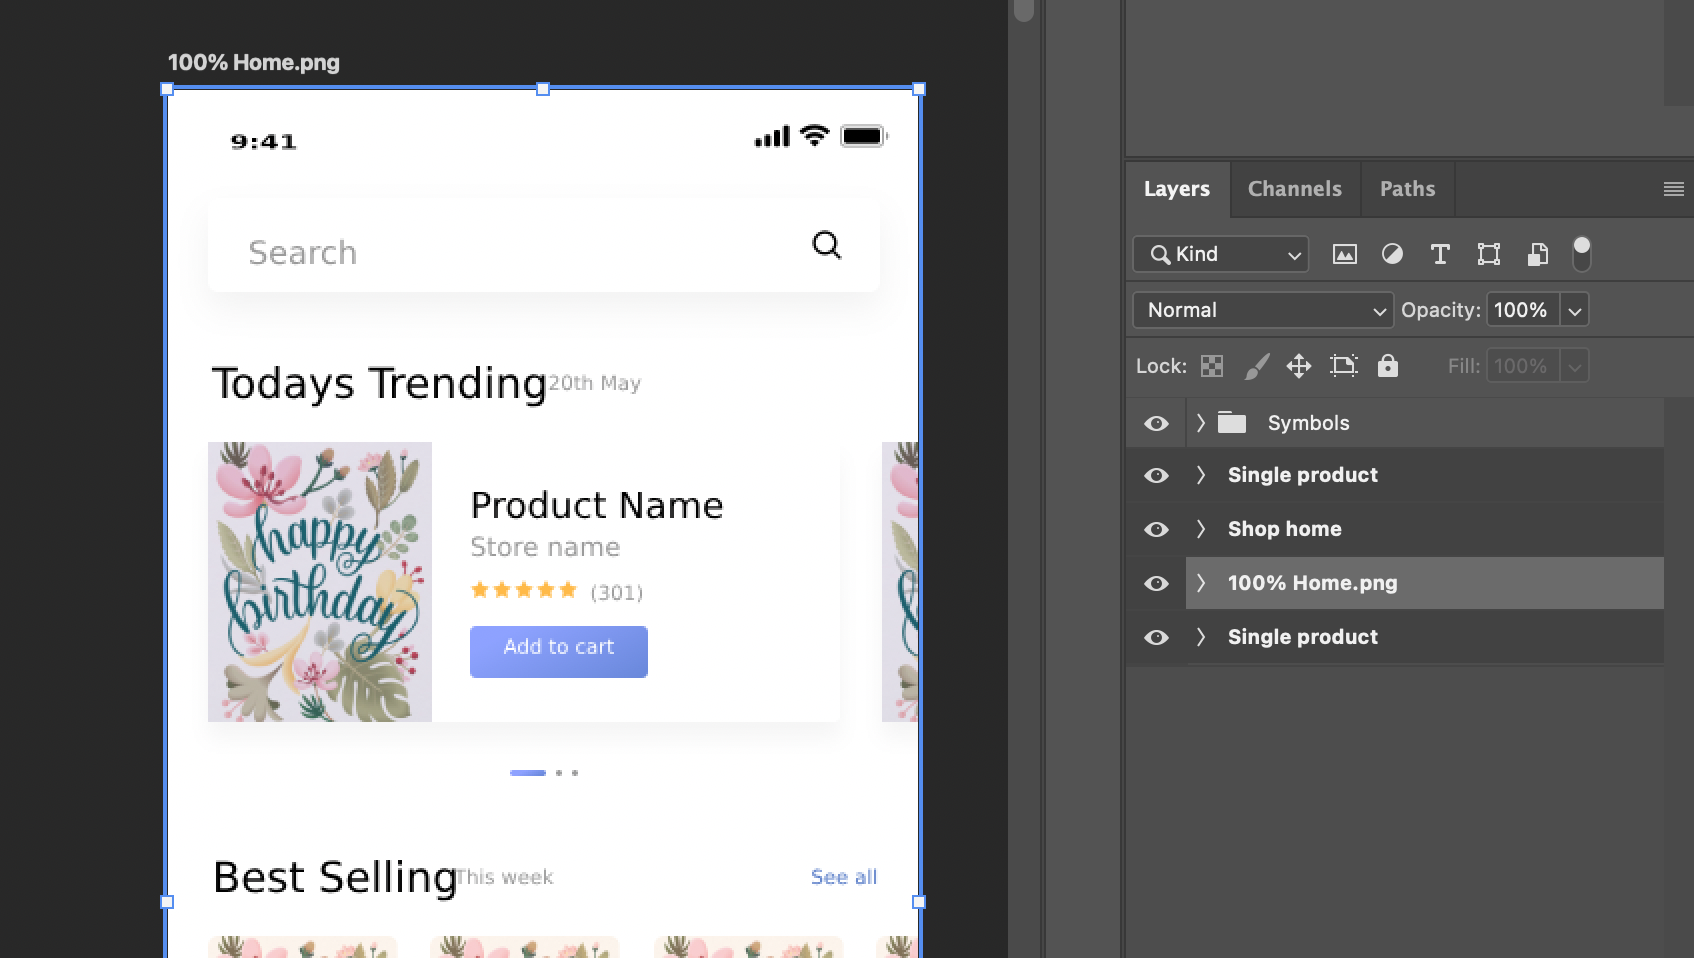
Now we have turned on the generator we need to rename the layers or artboards we want to export to Marvel. Rename a layer to
100% Home.png

If you want to export your layer to retina you can also use
200% Home.png
Hit save and now the layer is automatically exported in another folder next to your Photoshop file.
Step 3: Drag your images inside Marvel
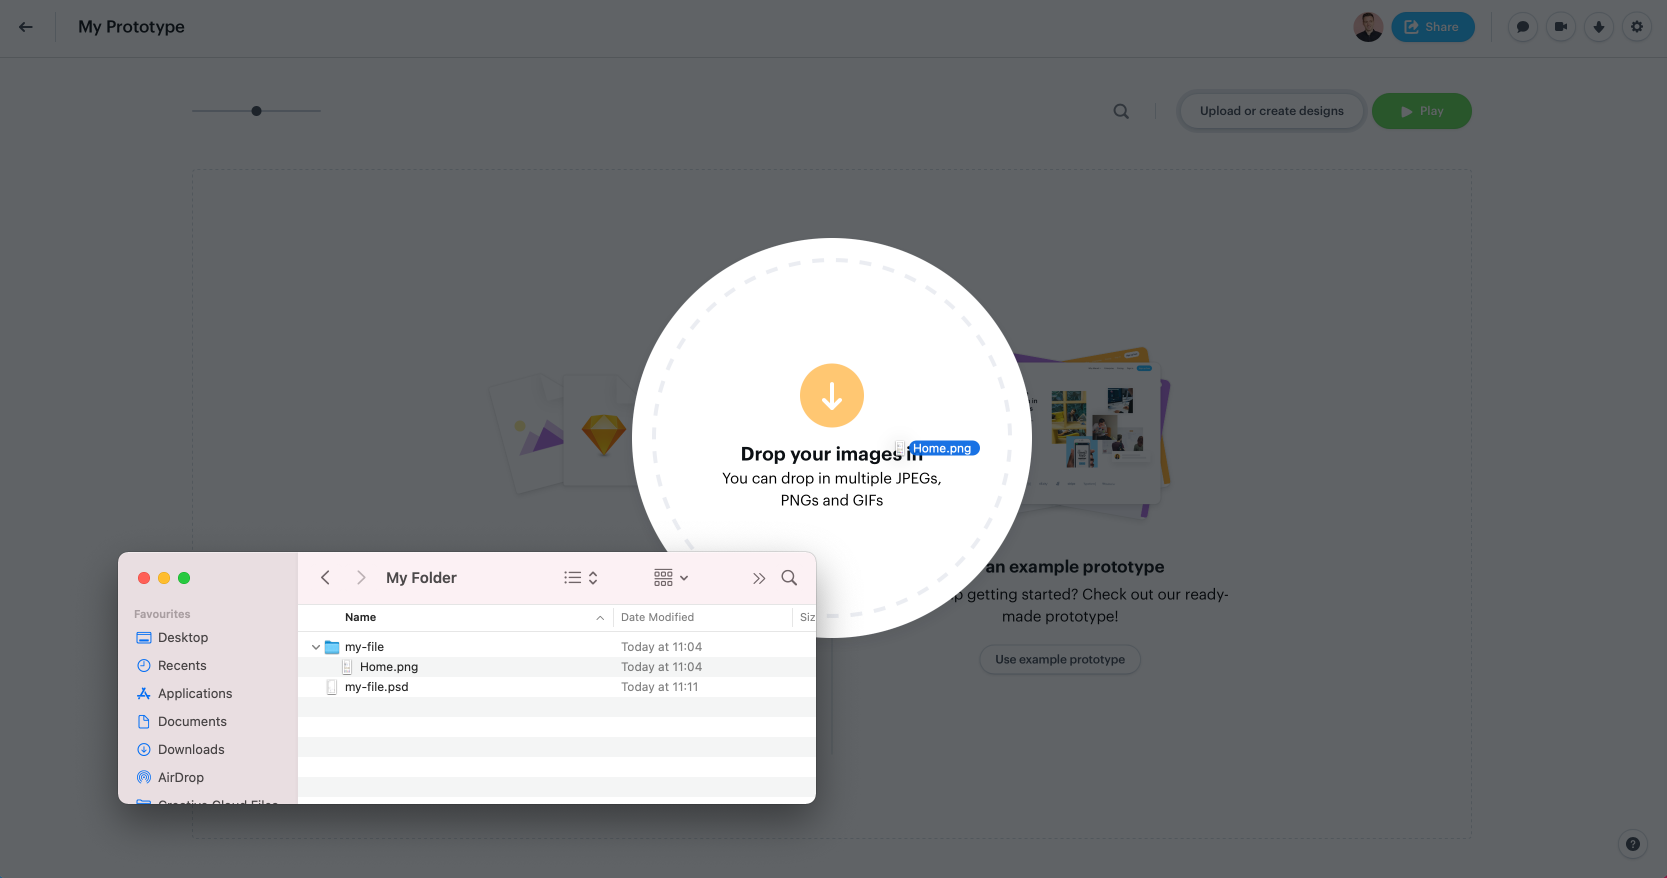
Now go your export folder and drag the images inside the project view in Marvel. Now every time you have made changes in your Photoshop file the images in the folder will get updated and when you want to make changes to your Marvel prototype you can just drag the images in Marvel again to update them. Just be aware that the filename of your image always has to be the same for them to update.
